The generation of electricity from solar panels is rapidly becoming the standard for the modern era. It’s renewable, environmentally friendly, and can lessen or eliminate your power expenses every month. The installation of solar panels in homes, offices, or even in fields is a very important job. Homeowners can install solar panels on their roofs if there is a shortage of space in their home. It is the most efficient use of rooftop space to install solar panels, which allows for maximum exposure to the sun. Mounting solar panels and beginning to generate your own electricity is feasible regardless of whether your roof is asphalt shingle, metal, or tile.
Many homeowners are hesitant to go solar because they are concerned about the potential harm to their current roof. In fact, if done correctly, relatively little damage can occur during installation. In case you’ve ever wanted to know “How to Install Solar Panels on a Roof,” this article will help you understand all the requirements before the installation of solar panels, the steps involved during the installation of panels, and the condition of the roof on which you are going to mount solar panels.
Also read: How to clean and maintain solar panels effectively?
Key considerations prior to installing solar panels on a roof
Prior to commencing the installation of solar panels on your roof, it is essential to undertake some crucial measures to guarantee an efficient and profitable installation. Thorough preparation is essential for optimizing the effectiveness and durability of your solar system. Here are some key factors that must be met before “how to install solar panels on a roof”.
i. Evaluate the condition of your roof
Before installing solar panel, it is imperative to evaluate the state and compatibility of your roof. Inspect for any indications of damage, such as leaks or areas of weakness, as these concerns should be resolved prior to installation. Furthermore, take into account the orientation and inclination of your roof. For optimal sunlight exposure throughout the day, it is ideal for the roof to face south and have no shade.
ii. Geographical dimensions of your current position
Location encompasses more than just the quantity of sunlight one receives each day. Peak sun hours significantly influence solar panel performance, however solar panels are still capable of generating electricity even in low-light conditions. Residing in a desert is not a prerequisite for your solar panel to provide sufficient power.
Nevertheless, if your roof is situated in an area with significant shade, you will not experience the same advantages as a solar panel that is exposed to direct sunshine. Conduct a thorough investigation of the typical amount of sunlight that your specific location receives, taking into account variables such as shade. It is advantageous to ascertain the potential value of your investment before making a commitment.
iii. Remove trees and vegetation
In order to optimize the amount of sunshine reaching your solar panels, it is necessary to cut any trees or vegetation that could create shade on the roof. This procedure will enhance the energy generation efficiency of your solar system.
iv. Assess the functionality and efficiency of your electrical system
Solar panels produce electricity that is integrated into the electrical system of your residence. Prior to installation, it is crucial to evaluate the capability of your electrical service panel to handle the extra energy produced by the solar system. There may be situations where an upgrade is necessary.
v. Identify the specific mounting system used
Various mounting options are available for solar panels, which can be chosen based on the kind of roof and personal preferences. Evaluate whether a system installed on the roof or on the ground is more appropriate for your property. Roof-mounted systems are more prevalent and economical, although ground-mounted systems provide increased adaptability and simpler upkeep.
vi. Seek professional advice
It is strongly advised to seek guidance from a professional solar installer or roofing contractor before beginning with the installation. They will assess the structural soundness of your roof and provide recommendations for any required repairs or alterations. In addition, they may assist you in identifying the optimal placement for the solar panels and devising a system that fulfils your energy requirements.
vii. Verify the issuance of building permits
Prior to installing solar panels, it may be necessary to acquire permits or comply with certain rules, depending on your geographical area. Conduct research on the construction codes in your area and reach out to your utility company to gain a clear understanding of any specific requirements or limitations. Adhering to these regulations is crucial to guarantee the safety and legality of your solar system.
viii. Evaluate your insurance policy
It is advisable to thoroughly examine your homeowner’s insurance policy before the installation process to confirm that it provides adequate coverage for any potential damages or losses that may arise as a result of the solar installation. Certain insurance firms provide tailored plans for solar systems; thus, it would be prudent to investigate these alternatives.
ix. Choose the right solar panel brand
The manufacturer from whom you choose to acquire your solar panels and the solar power system that converts and stores electricity is a crucial factor to consider. Not all brands or solar panels are of the same quality, and reputation is important. Prior to completing your purchase, it is advisable to thoroughly research the brand you intend to invest in. While you may believe that you have stumbled on a good deal, if you buy low-quality technology, it will probably require replacement sooner than you like.
How to install solar panels on a roof?
Steps involved during installation of solar panel on a roof are briefly explained one by one as below:
1. Assemble your materials
It is not possible to always be climbing up and down the roof, so you must first make sure that everything you need is close at hand. A ladder, a chalk line, a pencil, a drill bit, and a tape measure are the necessary items. All other items should be included in your solar panel kit.
2. Firmly affix the solar panel mount
This step is further sub-divided into following steps.
i. Secure the stanchions
It is crucial to ensure that the structure is inclined at a minimum angle of 18 degrees to maximize solar exposure. Search for the ideal location to repair the stanchions. Stanchions provide support to prevent the panels from being forcefully detached from the roof. The stanchions, resembling screws, are to be positioned on the rafters of your roof. To find the rafters, consult the blueprint of your house if you are unaware of their position.
After pointing out the location of the rafters, the subsequent task involves securing the stanchions onto the roof. Typically, the spacing between stanchions should be four feet. For the stanchions to be attached, drill holes in the rafters.
ii. Installation of the flashing
Elevate the shingles and insert the flashing beneath them. Securely attach the flashing to the rafters using a bolt. The purpose of flashing is to prevent water from entering your house after drilling a hole. In addition to the flashing, the bolts are equipped with a seal to prevent any potential leaks.
iii. Securely connect the rails
Insert the screws into the designated holes and secure them firmly. Next, utilize bolts to securely attach the upper and lower rails to the stanchions. An impact driver will guarantee that everything is securely attached.
iv. Determine the precise distance between the two parallel rails
Next, it is important to verify that the rails are parallel to one another. Determine the distance between them by employing a measuring tape. The diagonal distance must be precisely identical. If the space is not same, adjust the rails to achieve equilibrium.
v. Position the middle rail
The intermediate rail should extend vertically from the upper rail to the lower rail. The middle rail must span from the upper rail to the lower rail, providing uninterrupted support across the whole solar panel array.
vi. The electrical connections
It is important to install a power inverter kit beneath each panel. Next, verify that copper wires are present in your inverter kits. The connections should be both incoming and outgoing from the solar panels.
3. Secure the Solar Panels in Place
The panels can be installed when the mounts have been firmly set.
If you’re looking for solar panels for your roof, various brands provide you with both rigid and flexible options. You shouldn’t have much trouble installing them, regardless of how slanted or weird your roof is. Before you attach the panel to the mount, double-check that all of the bolts and nuts are snugly tightened. They will remain in their designated spots regardless of the weather if you do this.
4. Connect the Portable Power Station or Inverter to the Solar Panels
Wiring is the next step. Even while this seems like the most complicated portion, it’s actually rather easy. Because they work with every type of solar panel, Universal Solar Connectors are the most common. Do not try this until you have turned off the power to the entire house; else, you can end up electrifying yourself instead of your panels.
5. Make use of a portable power source
The inverter transforms the solar energy your panels collect into usable electrical power. The inverter and all the necessary components for a fully assembled plug-and-play solar power system are already included in solar generators and portable power stations.
Ideally, you should put your inverter somewhere cool, close to your main electrical panel. Keep the solar inverter out of the sun’s rays if you decide to set it up outside.
6. The inverter must be connected to the consumer unit
Lastly, attach the inverter to the consumer unit, also known as the fuse board. In addition to installing solar panels, you’ll need to hook up solar batteries to your consumer unit so you can store the energy you produce. Due to the integrated design of Solar Generators and Portable Power Stations, this step is superfluous. The amount of power your solar panels produce can be determined with the use of a generation meter.
How to install solar panels on different types of roofs?
Every house has its own roof structure. These roofs can vary in shape and type of material used for their construction. For such kind of roofs, installation process of solar panels also varies. Let’s examine different types of roofs and how to install solar panels on different types of roofs.
i. Tile Roofs
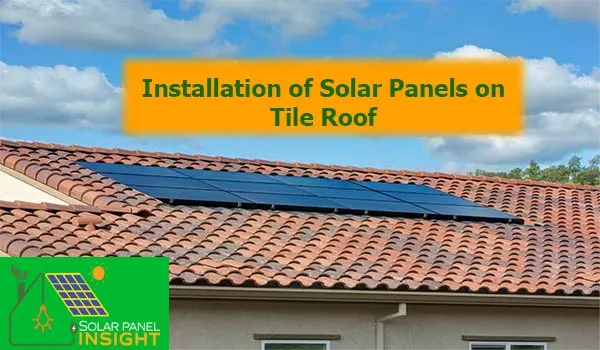
Whether they are composed of clay or concrete, tile roofs provide a one-of-a-kind and refined look. They are commonly seen in buildings that are designed in a Spanish or Mediterranean style. Conventional solar panels, particularly when combined with heavy clay tiles, can put a burden on the roof’s structural integrity. Avoiding damage requires proper flashing and mounting systems. Roofs made of tile work nicely with frameless solar panels that use low-profile mounting solutions. They make the load more uniform and create a modern look.
ii. Flat Roofs
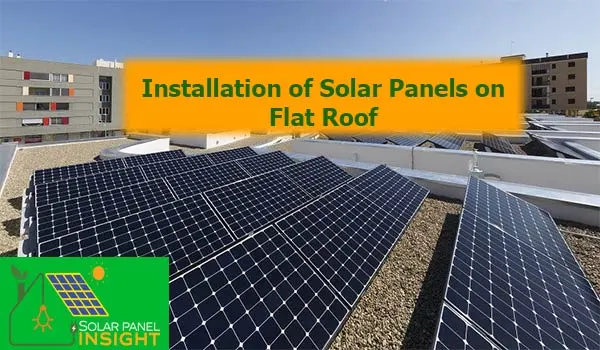
Many commercial structures have flat roofs. They offer plenty of room for solar panels. Flat roofs prevent enough solar radiation from reaching the ground. Stability cannot be guaranteed without adequate drainage and balancing systems. Installing tilted racking systems with solar panels made for flat roofs is the best way to maximize sun exposure when using solar panels. In order to anchor the panels without drilling into the roof, ballasted methods are used.
iii. Metal roofs
Durability, ease of care, and a lengthy lifespan are three of metal roofing’ most lauded qualities. Steel, aluminum, and copper are just a few of the materials available, giving you plenty of options when it comes to their appearance. In order to avoid roof leaks, it is important to carefully analyze the penetration and sealing procedures for fasteners. Installation might be impacted by the metal kind and thickness.
Metal roofs work best with thin-film solar panels or PV panels with a low profile. Because of their adaptability and low weight, they can be used on a variety of metal roof types without sacrificing strength.
iv. Slate Roofs
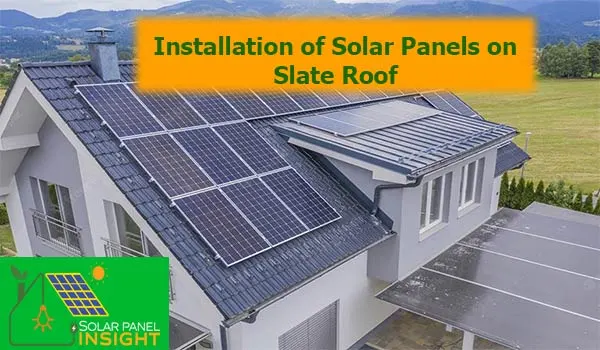
Elegant and very long-lasting, slate roofs are a great choice. They are common on older structures and can endure for more than a hundred years. Extreme caution must be exercised while installing slate roofs due to their fragility. The aesthetic value of the roof can’t be compromised by mounting devices that are too obvious. Installing frameless solar panels on such roofs using low-profile mounting gear is the best solution. There is less chance of roof damage due to their lightweight design.
v. Asphalt shingle Roofs
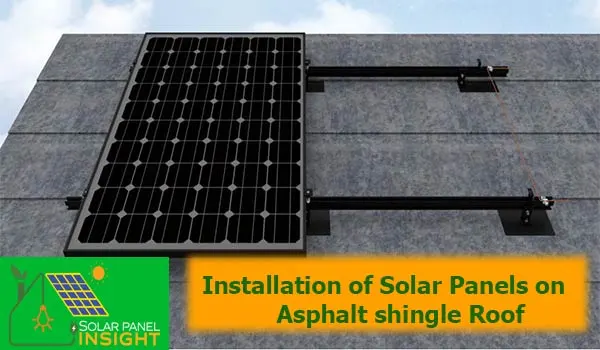
Asphalt shingle roofs are common because they are inexpensive and can be used in many different ways. They are among the most popular roofing materials in North America due to their low weight and easy installation nature. Solar panels are best installed on asphalt shingle roofs, although the shingles themselves don’t last as long as the panels.
Monocrystalline and polycrystalline panels made of crystalline silicon can be installed on asphalt shingle roofs. They are available in a range of sizes to accommodate different spaces, and they convert energy efficiently.
vi. Wood shake Roofs
The rustic beauty and endearing charm of wood shake roofs are hard to beat. Their unique appearance conceals their construction from raw wood. Wood shake roofs aren’t always resilient enough to withstand the elements. In order to preserve their visual value, it is necessary to use proper flashing and installation solutions. Wood shake roofs are perfect for frameless solar panels that have hidden mounting hardware. They maintain the roof’s aesthetic value by blending in flawlessly.
Final Thoughts
In this modern age, choosing the best approach for mounting solar panels on top of the house is not a big deal anymore. However, it is necessary to take wise steps during the installation process. Two main considerations that must be kept in mind are the orientation of your roof and its design. To summarize, the whole article on how to install solar panels on a roof includes:
Fasten the stanchions to the rafters of your roof after you have collected all of the necessary materials. The next step in protecting your roof against leaks is to place the flashing under the tiles. After that, line up the top and bottom rails parallel to each other, and then the middle rail. After that, attach a solar inverter system and run the wires via the rails to an electrical meter.

